
Shopify Integration
The SmartConsign – Shopify integration allows you to import Shopify orders directly into the SmartConsign portal, where shipments are created and managed manually.
This integration focuses on reliable order import, manual shipment control, and clean Shopify timelines. Estimated setup time: 15–20 minutes
Make sure you have:
- A Shopify store
- A SmartConsign account
- Access to Shopify Admin
- Permission to create apps and webhooks
Sends order events from Shopify to SmartConsign.
Each order creates an Unallocated Shipment.
Allows SmartConsign to:
- Add tracking numbers
- Mark orders as fulfilled
- Update Shopify timelines
Once the integration is active:
- Orders created in Shopify are imported into SmartConsign.
- Each order creates an Unallocated Shipment.
- Shipments and labels are created manually in SmartConsign.
- Tracking information is automatically fulfilled back to Shopify once the label is created in the SmartConsign portal.
- No SmartConsign notes are added to the Shopify order timeline.
When creating the channel, enter the values exactly as shown in the SmartConsign portal UI.
These values are generated during the app and webhook setup steps.
Store them securely — they are required when connecting Shopify to SmartConsign.
| SmartConsign Field | Shopify Value |
|---|---|
| Private App Client Id | Client ID (32 characters: letters and digits) |
| Private App Secret | Secret (32 characters: letters and digits) |
| Webhook Secret | Webhook Secret (64 characters: letters and digits) |
| Shopify Domain URL | yourdomain.myshopify.com |
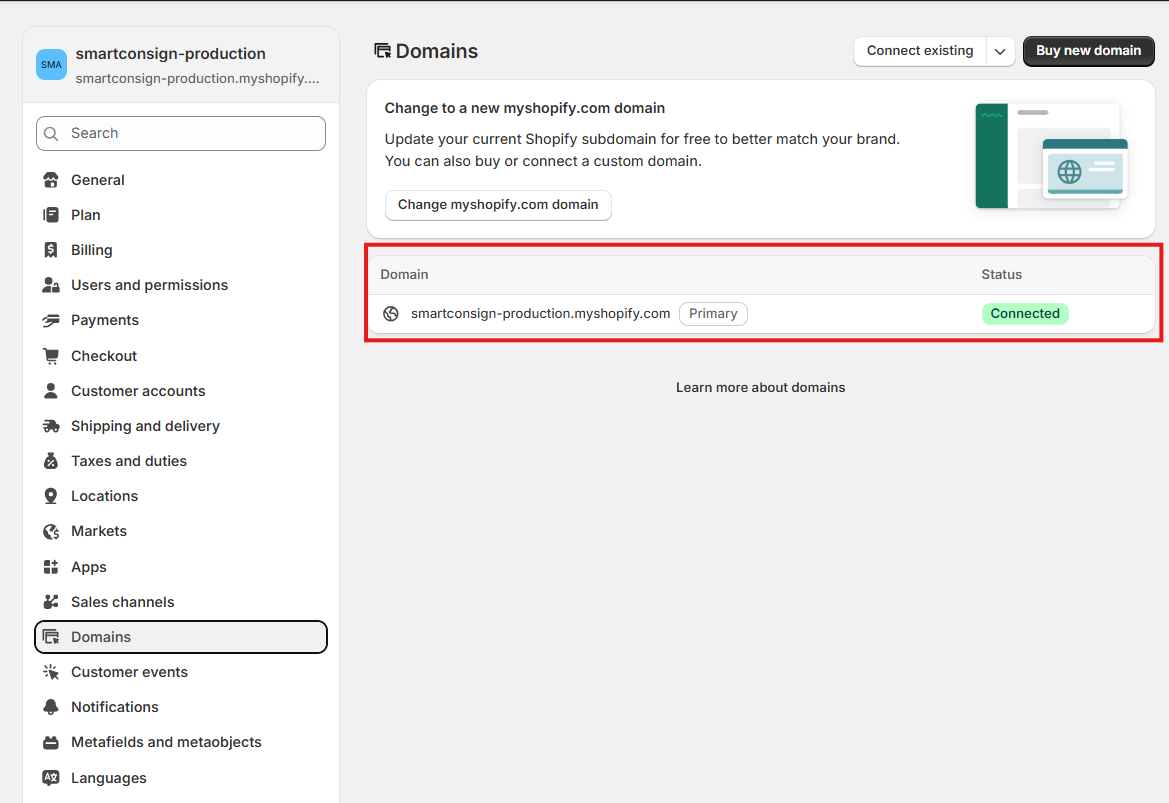
The Shopify Domain URL must match your Shopify store domain exactly otherwise webhooks and fulfillments will not work! You do not need to create any custom domains or change your Shopify domain settings. Just use the Primary Domain provided by Shopify.
To find your store domain:
- Go to Shopify Admin
- Navigate to Settings → Domains
- Copy the Primary domain
⚠️ Important: Always use the Primary Domain ending in
.myshopify.com.Do not use custom domains such as:
www.yourstore.com
⚠️ Important — Legacy Private Apps Deprecated
As of 1 January 2026, Shopify no longer allows new legacy private apps to be created from the store admin.
All new apps must be created through the Shopify Dev Dashboard.
A Shopify app is required to allow SmartConsign to access your store data and fulfill orders.
-
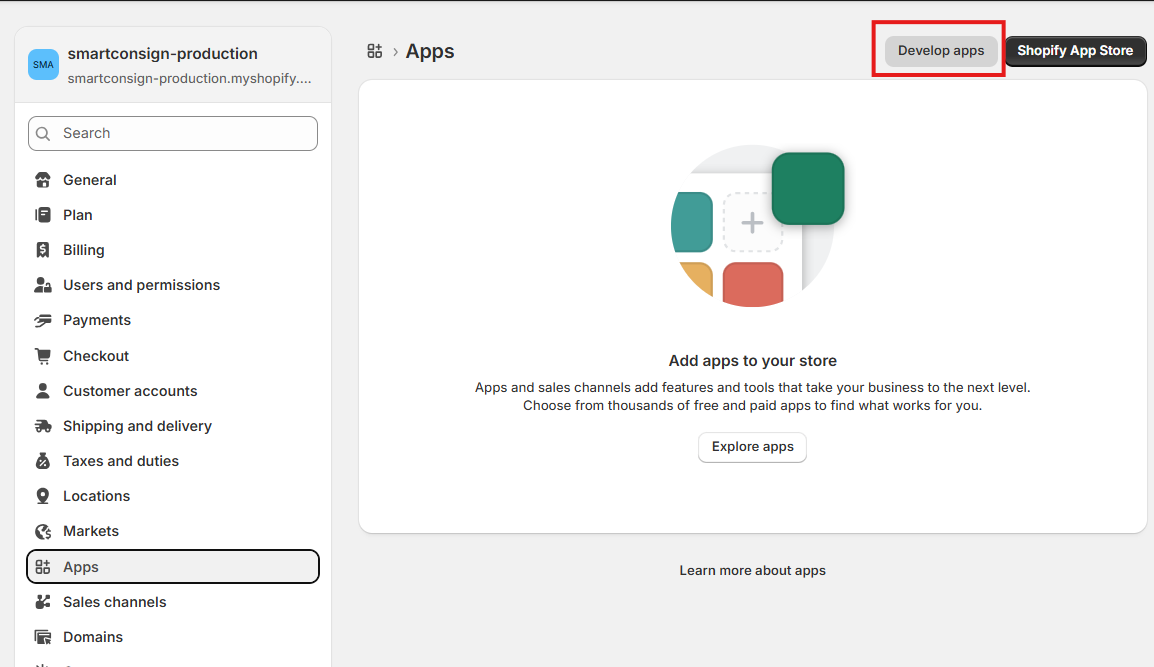
Log in to your Shopify Admin.
-
Navigate to:
Settings → Apps
- Then click Develop apps.
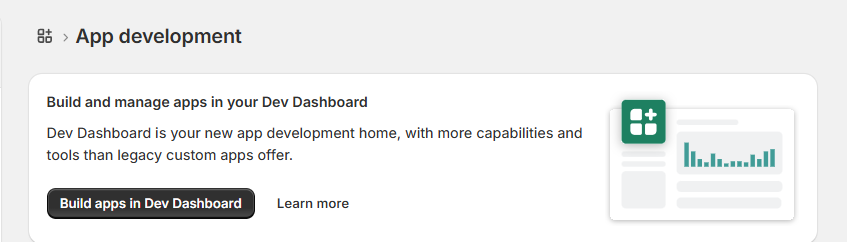
Click Build apps in Dev Dashboard.
This opens the development dashboard in a new browser tab.
Inside the Dev Dashboard:
-
Click Create app.
-
Enter a name such as:
SmartConsign Integration
Example — Create App Screen

- Enter the application name and click Create.
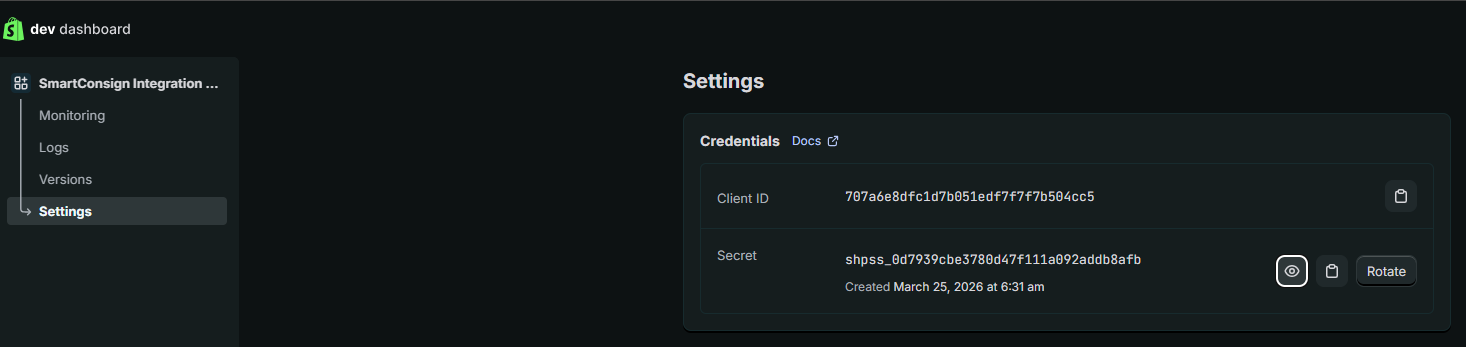
After the app is created:
-
Open the Settings tab.
-
Copy and securely store:
- Client ID
- Client Secret
⚠️ Important: Save these credentials securely. They will be required later when creating the Shopify channel in SmartConsign.
This section allows SmartConsign to send fulfilment updates and tracking information back to Shopify.
1. Create a new app version
Inside the app:
- Go to Home
- Click New version.

2. Add the required permissions
- Under Access, click on Select scopes:
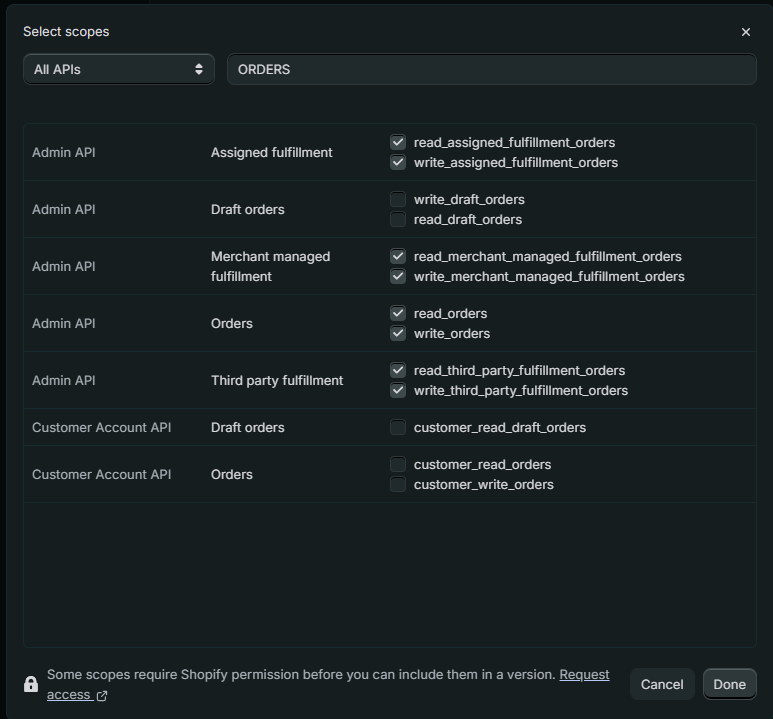
Required permission categories:
- Orders
- Fulfilment services
- Merchant-managed fulfilment orders
read_all_orders
read_assigned_fulfillment_orders
write_assigned_fulfillment_orders
read_merchant_managed_fulfillment_orders
write_merchant_managed_fulfillment_orders
read_orders
write_orders
read_third_party_fulfillment_orders
write_third_party_fulfillment_orders
⚠️ Important: All scopes listed above must be added. Missing permissions may prevent fulfilment updates from working correctly. These permissions allow SmartConsign to send fulfilment updates and tracking information back to Shopify.
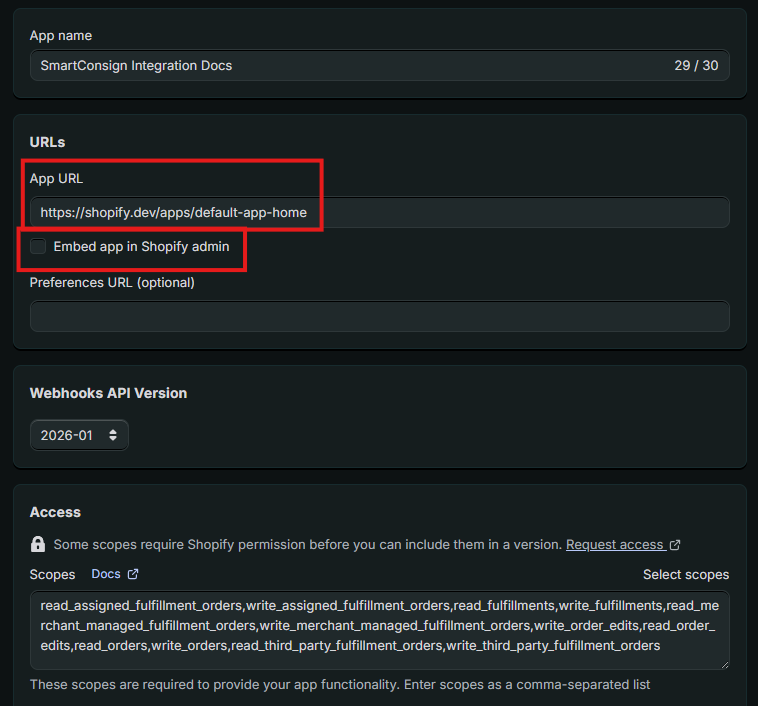
3. Configure the app URL settings
| Setting | Value |
|---|---|
| App URL | https://shopify.dev/apps/default-app-home |
| Embed App | Unchecked |
This must be set exactly as above.
4. Release the app version
Click Release, then confirm Release again.
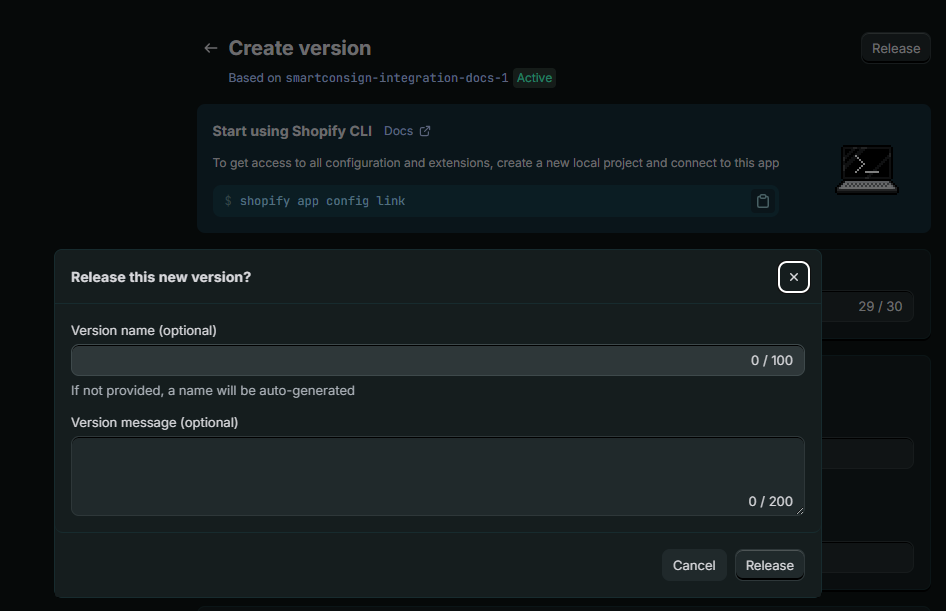
At this point, the Shopify app permissions are configured and ready to be installed.
- Click Install app on the Home tab.
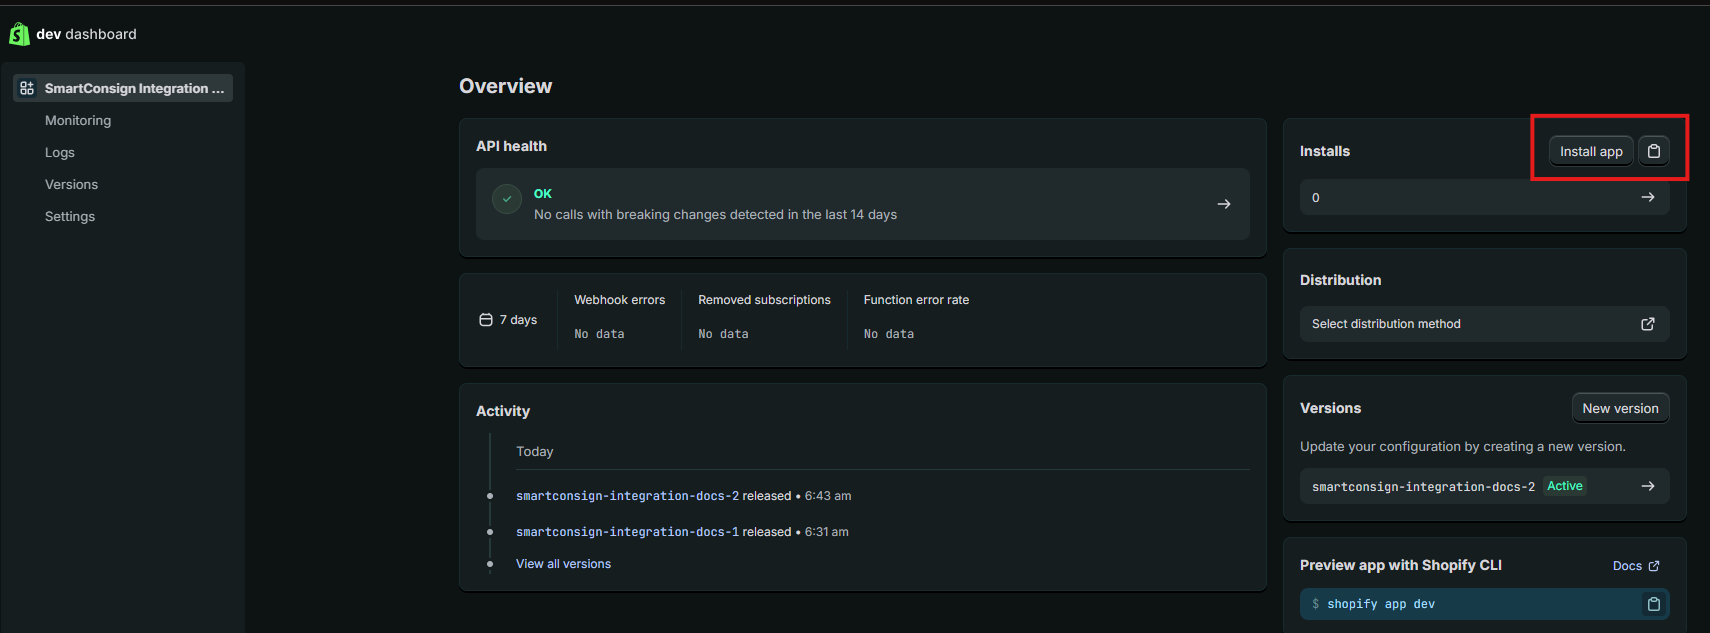
- Confirm installation.
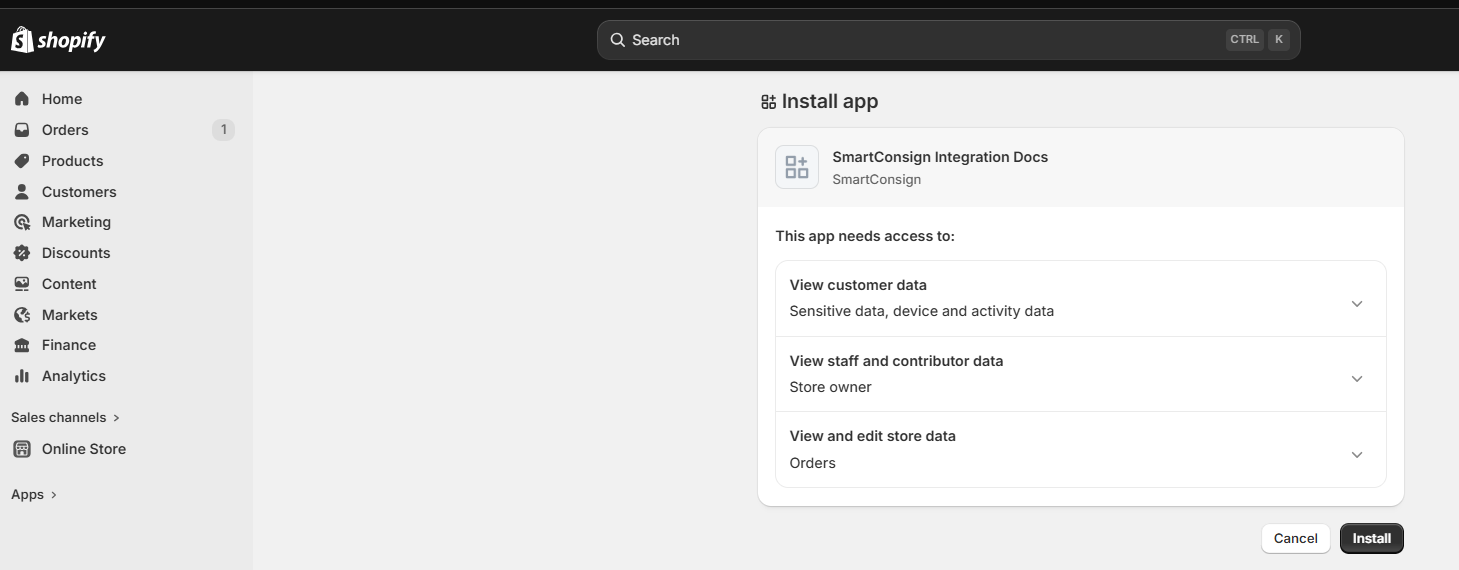
- Select your Shopify store: Make sure the selected store matches the Shopify Domain URL you will use in SmartConsign.
SmartConsign uses Shopify webhooks to receive order events. This webhook sends order payment information to SmartConsign, allowing shipments to be created automatically.
- In Shopify Admin, go to Settings → Notifications
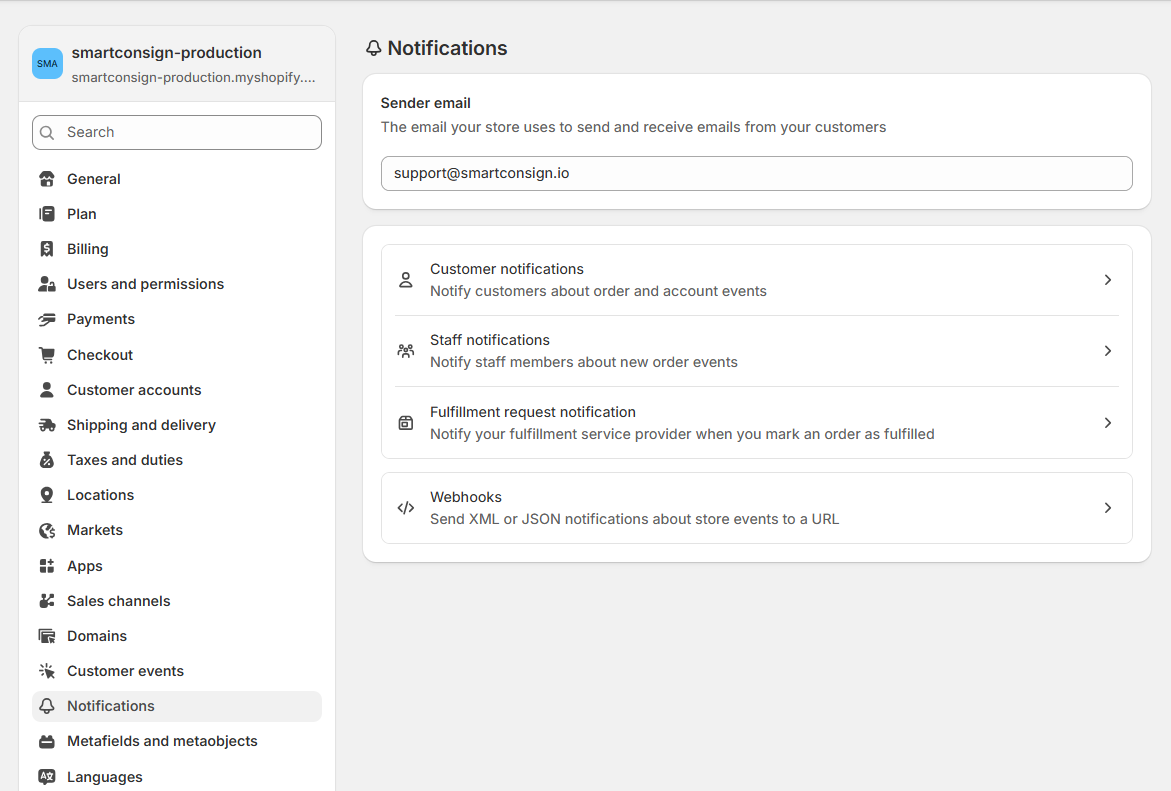
- Go to Webhooks and click Create webhook
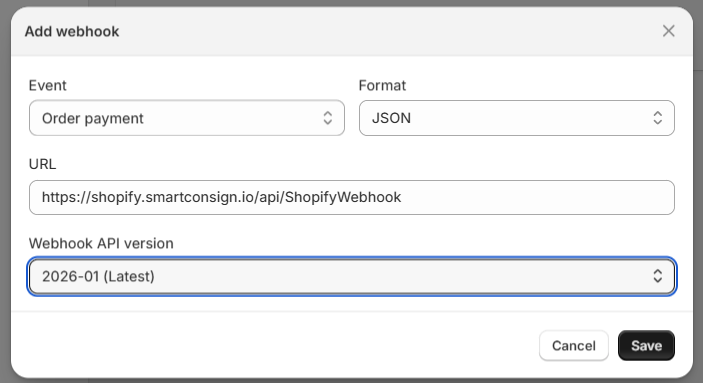
- In the opened window, configure the webhook as follows:
- Save the webhook
⚠️ Important: Events can be either Order Payment or Order Created. This can be whichever you prefer the webhook to trigger on and then import into SmartConsign. After the order has been created or after the order has been marked as paid. Select only one event. If both Order Payment and Order Created are configured, the same order may be imported twice into SmartConsign.
| Setting | Value |
|---|---|
| Event | Order Payment or Order Created |
| Format | JSON |
| URL | https://shopify.smartconsign.io/api/ShopifyWebhook |
| API Version | Latest |
- After saving, copy the Webhook Secret.
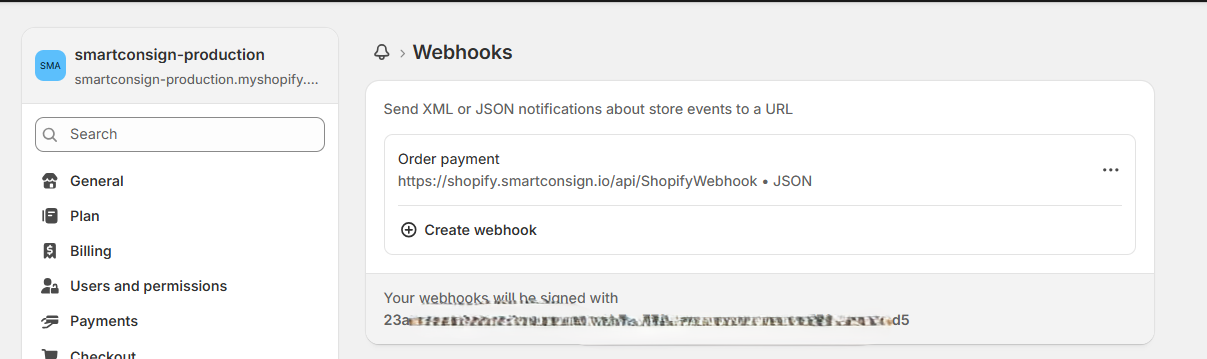
- Collect and store this value securely.
In this section, you will connect your Shopify store to SmartConsign using the credentials collected earlier.
- Log in to the SmartConsign Portal
- Navigate to
Channels → Manage Channels - Locate Shopify and click Add Integration
- A new window will open
- Fill in all required fields with valid values: Enter values exactly as copied from Shopify.
| Field | Value |
|---|---|
| Private App Client Id | Client ID |
| Private App Secret | Client Secret |
| Webhook Secret | Webhook Secret |
| Shopify Domain URL | Primary domain from Shopify Domains page |
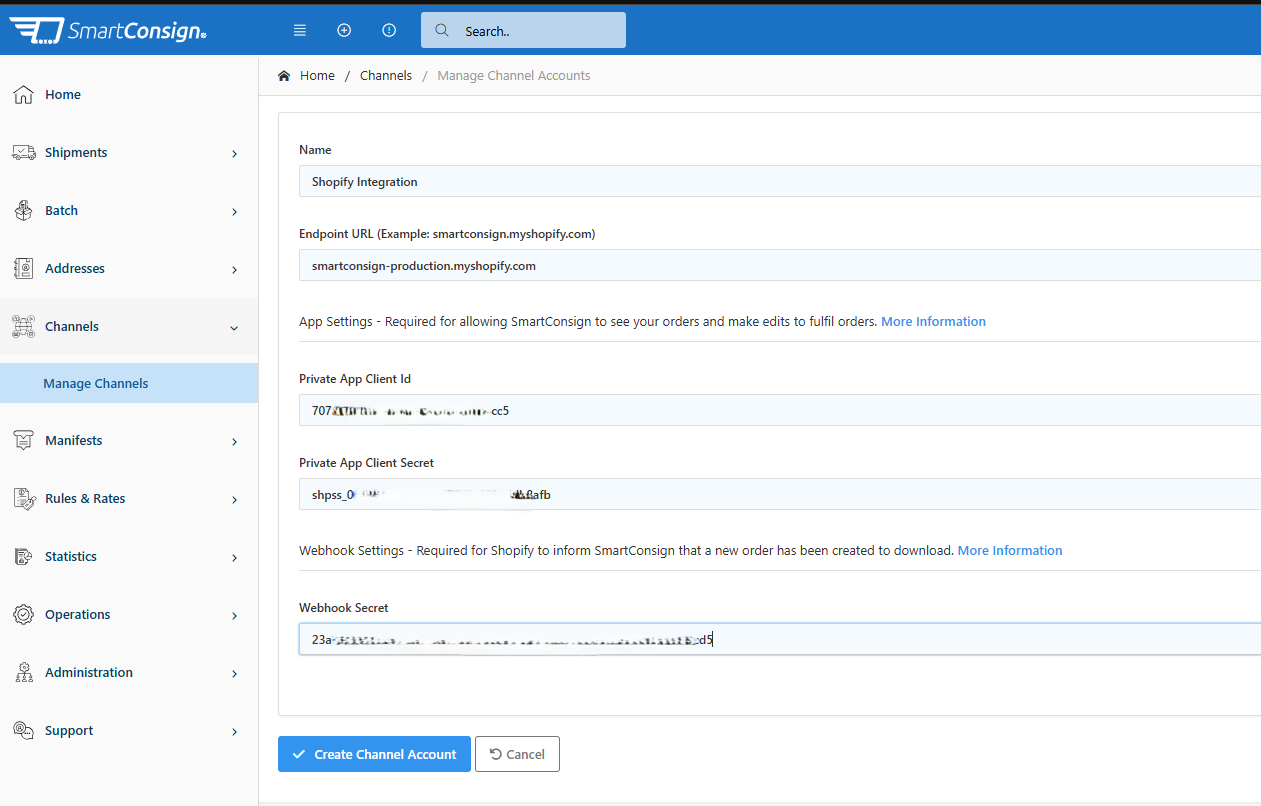
- Click Create Channel
That’s it 🎉 — the integration is now active.
You can immediately test if the integration works after entering your details into SmartConsign.
Follow these steps to confirm the integration is working correctly.
- Send a test webhook from Shopify.
- Open the SmartConsign Portal.
- Confirm a new Unallocated Shipment appears.
- Delete the test shipment if required.
If the shipment appears, the integration is working correctly.
Testing the webhook is the fastest way to confirm the connection between Shopify and SmartConsign is working correctly, This can only be tested after entering the data and creating the account in SmartConsign.
-
Locate the webhook you created.
-
On the webhook row, click ⋯ (three dots).
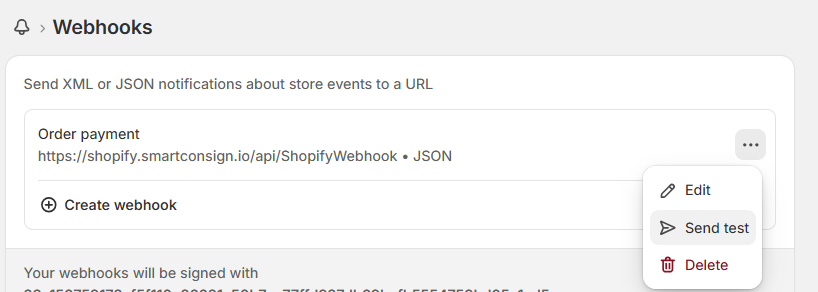
-
In the dropdown, select Send test option.
-
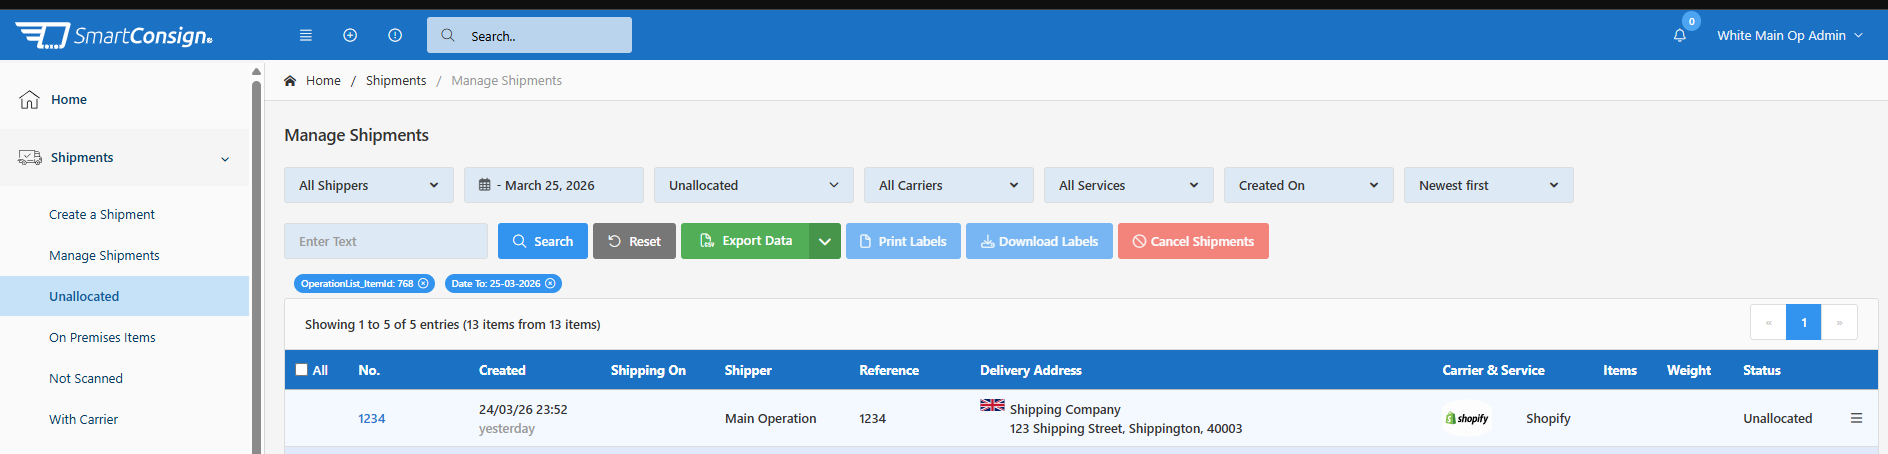
Open the SmartConsign portal and check for a newly created Unallocated Shipment.
- If the test is successful, you will see an Unallocated Shipment created in SmartConsign.
- If this has failed please verify your Shopify Domain URL and Webhook Secret are correct.
The test shipment:
- contains dummy data
- can be deleted safely
- does not create an order number in Shopify
Label creation and shipment processing are handled entirely in SmartConsign.
- Orders import as Unallocated Shipments
- The shipper selects carrier and service in SmartConsign
- Labels are generated manually
- Tracking automatically fulfils the order in Shopify
- Shopify timelines remain unchanged
Cancelling or modifying shipments is managed in SmartConsign and may depend on carrier rules.
For standard Shopify order actions, refer to:
An unallocated shipment means:
- No carrier or service is assigned automatically
- No label is generated
- The data is imported without allocating the courier, courier service or producing the shipping label.
- The user completes shipment details and generates the label in SmartConsign
- The order is then Fulfilled in Shopify with tracking information once the label is created in SmartConsign. This will take a few minutes.
If your Shopify environment has specific requirements or you need assistance, please contact your SmartConsign setup provider or support team.