
Getting Started
From your welcome email to your first shipping label — follow these steps once your onboarding form is complete and your account has been set up.
After you complete the onboarding form, a Shipper and a user account are created in SmartConsign. Your Shipper is the shipping profile set up for your business.
- Find the email containing your username and password.
- Open SmartConsign and sign in using those details.
What is already set up? Carrier account details supplied during onboarding are automatically added. A carrier account connects your shipping setup to the carrier you want to use.
Missing carrier credentials during onboarding? You can complete that setup later with Support. You need a configured account before shipping with that carrier. More about carrier accounts →
Use this route to enter a shipment yourself. Have the delivery address, recipient’s contact details, a shipment reference, and each parcel’s weight and dimensions ready. You may also need a description and value of the goods.
In the left-hand menu, expand Shipments and select Create a Shipment.
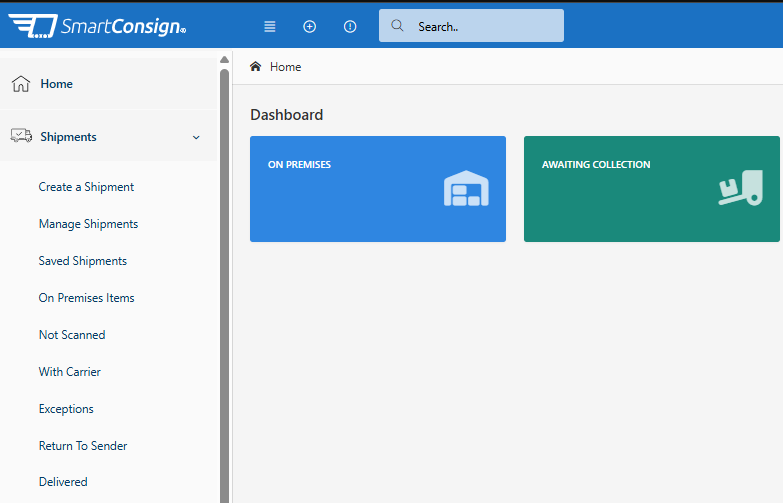
Start with Create a Shipment. Use Manage Shipments for created shipments and Saved Shipments for records you saved to finish later.
- In Shipment Details, choose the Carrier, Account and Carrier Service. The service is the delivery option you want to use.
- Complete your shipment reference and any other required fields marked with an asterisk
*. - Check Sender Address and complete Delivery Address.
- Under Shipment Pieces, check each parcel’s weight and dimensions. A piece is one parcel or package. To add parcels, enter the number needed, select Add Pieces, then enter the weight and dimensions for every added parcel.
- Complete any customs information requested for the shipment, where applicable.
- Review all details, including anything filled in automatically.
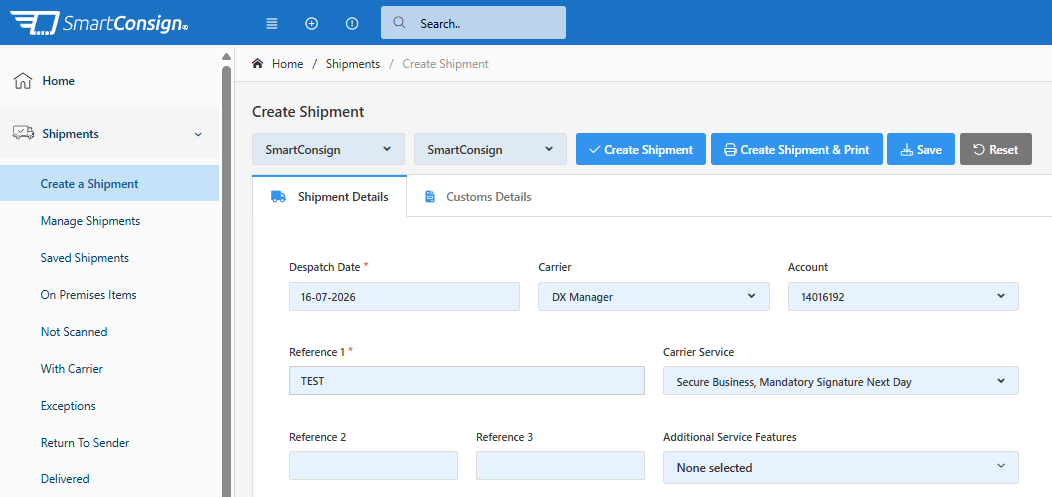
The top of the form contains your carrier and service choices. The action buttons let you create, create and print, or save for later. Your account and carrier choices will depend on your setup.
Need help with a field? Open the full Create a Shipment guide →
When the details are complete, make sure you have an available printer, then select Create Shipment & Print. You can also create the shipment now and print or download its label later.
| If you want to… | Choose… | What happens |
|---|---|---|
| Create the shipment and print now | Create Shipment & Print | Creates the shipment and sends its label to print. |
| Create the shipment and access the label later | Create Shipment | Creates the shipment; open its details for label actions. |
| Keep the details and finish later | Save | Saves the record without creating a carrier shipment or label. |
Once you see the confirmation message that the shipment has been created, find it under Shipments → Manage Shipments.
Chose Save? Return to Shipments → Saved Shipments, select Edit, complete the details and create the shipment when ready.
- Open Shipments → Manage Shipments and find your shipment.
- Tick the checkbox beside the shipment. You can select more than one shipment if needed.
- The Print Labels and Download Labels buttons become available for eligible selected shipments. Choose Print Labels to print, or Download Labels to save the label files.
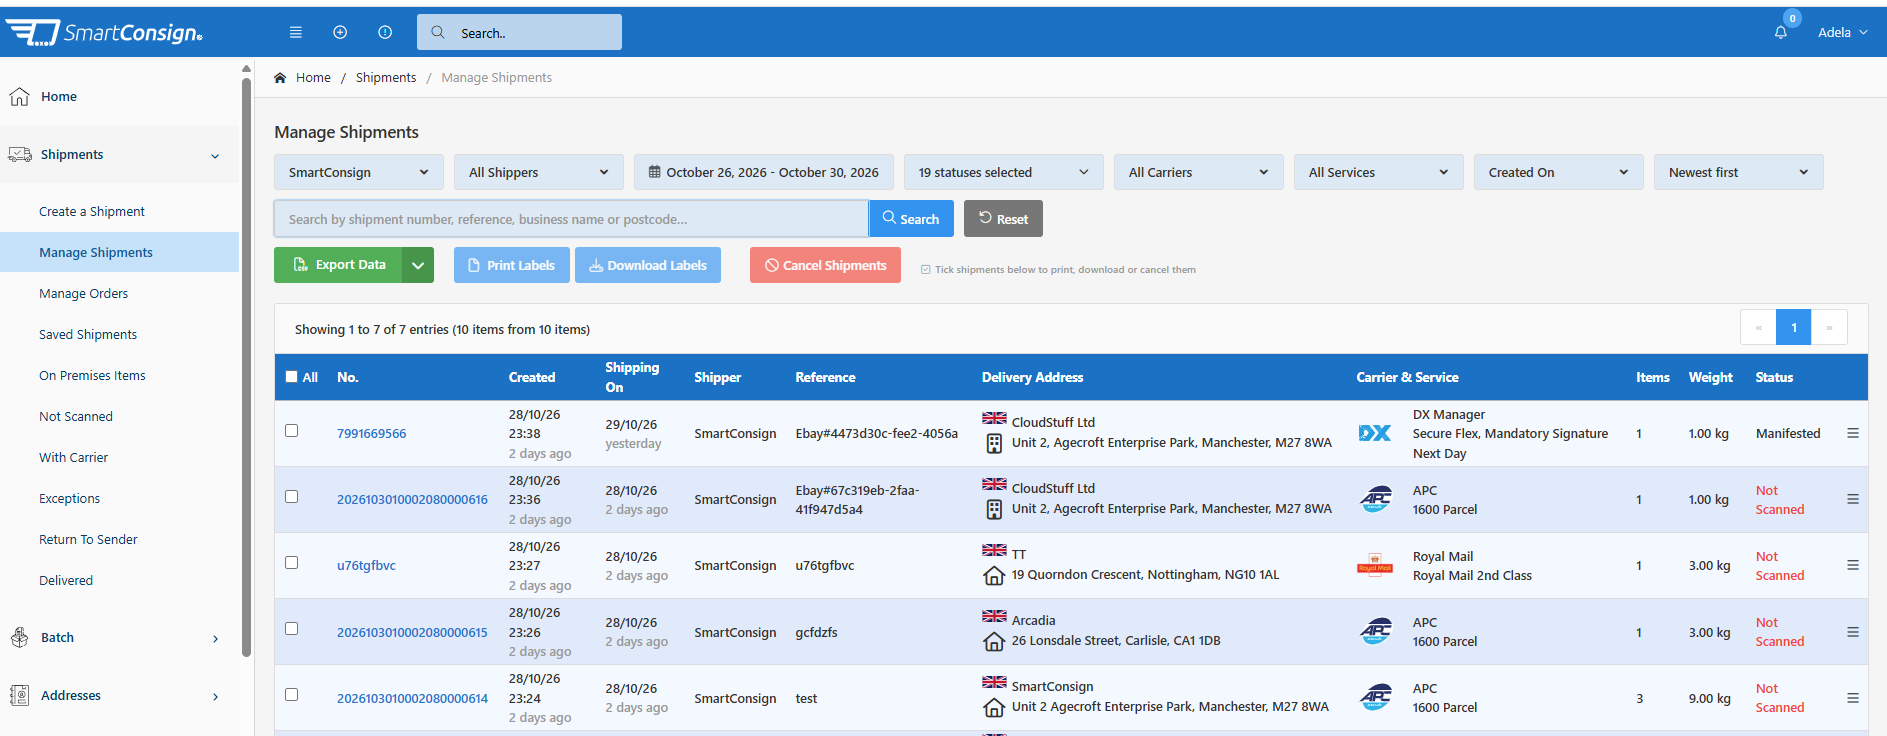
Tick the shipment checkbox first to enable the label buttons for eligible shipments. Make sure you have an available printer before printing.
From the shipment row: open the menu icon ☰ at the far right of the row, then choose Print Label or Download Label. You can use these options directly for that shipment.
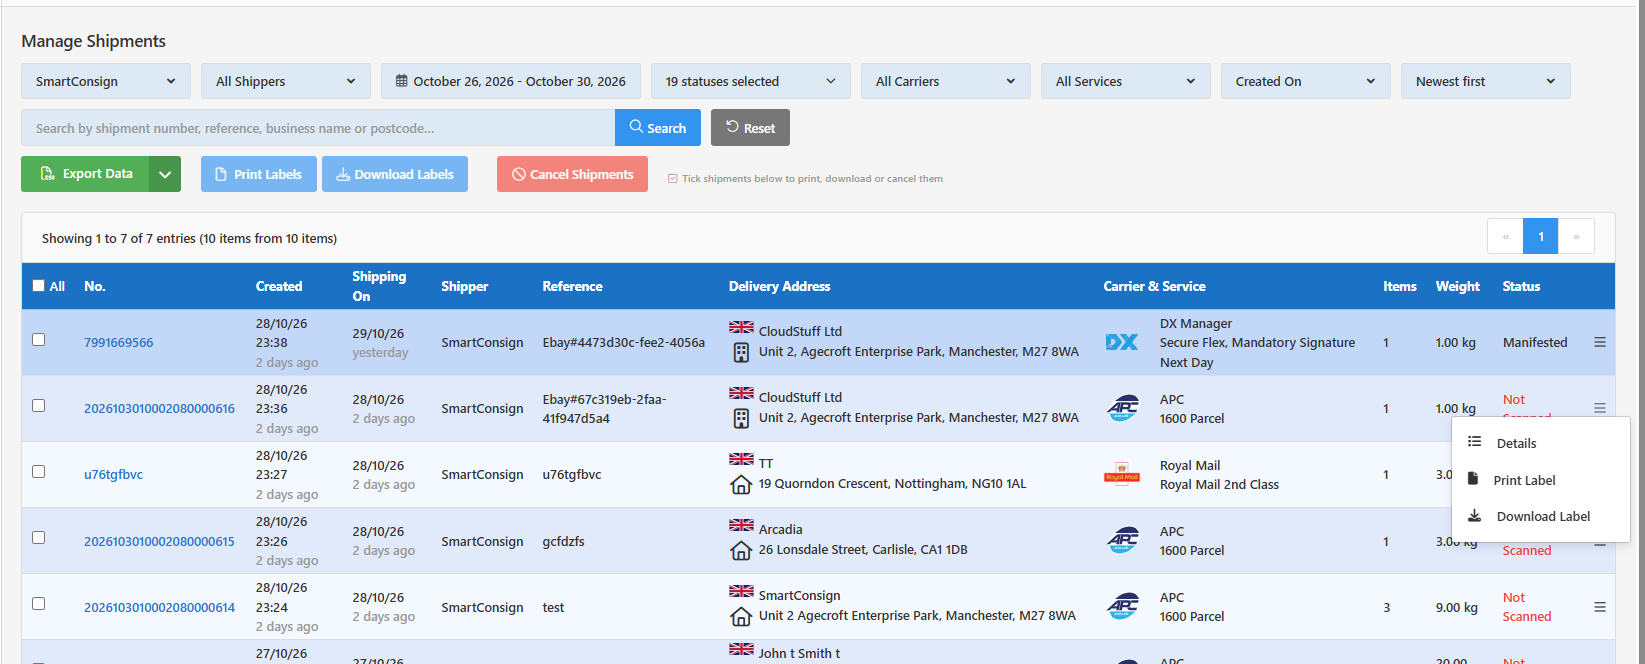
For a single shipment, use the print or download option in its row menu.
From Shipment Details: select the shipment number, or choose Details from the row menu. Select Print label to print. Open the arrow beside it and choose Download label to save the label file.
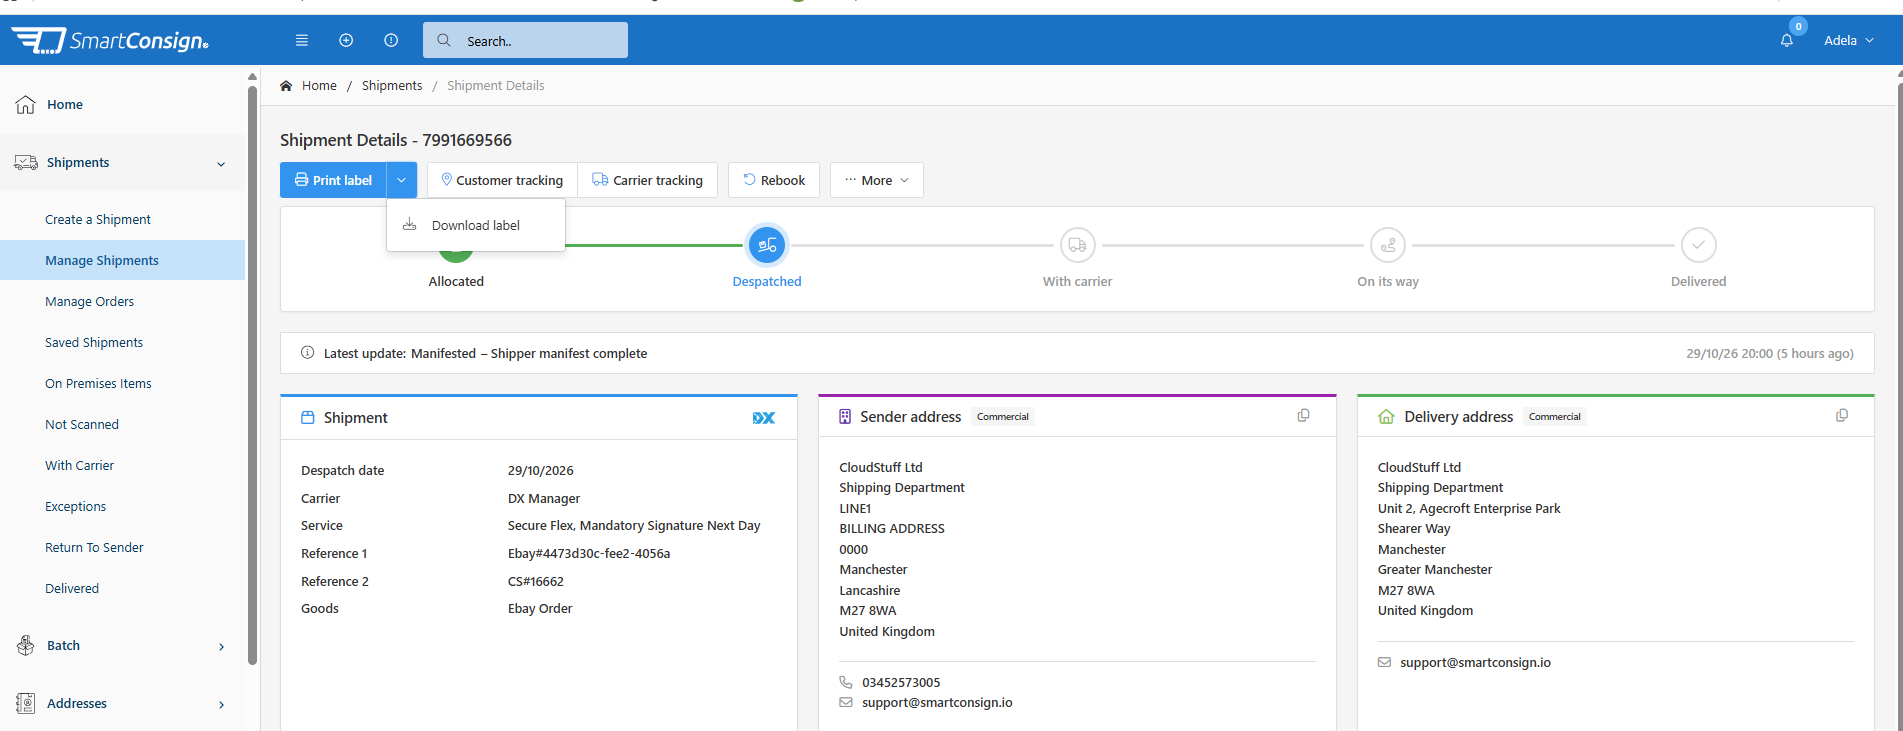
Shipment Details brings label actions and customer or carrier tracking together.
If the label did not print, check for the created shipment in Manage Shipments before creating another one. You can print or download its existing label using the options above.
More about managing shipments →
More about labels and tracking →
SmartConsign automatically triggers the manifest at the end of the day. The manifest is the end-of-day shipping record for the carrier. Its scheduled time can be customised for your setup.
You do not need to trigger the routine end-of-day manifest yourself. After manifesting, shipment statuses update through the carrier API integration according to the carrier’s process and the updates it provides.
To follow progress, open the shipment in Manage Shipments and view Shipment Details. Use Customer tracking or Carrier tracking for the available tracking information.
Once your sales channel is connected, use SmartConsign to manage imported orders, create carrier shipments and print labels.
Here is the usual flow:
- Orders arrive in SmartConsign. Orders from your connected sales channel are imported with the available product and customer information. The details supplied depend on the integration.
- You create the shipment in SmartConsign. Find the order in Marketplaces → Manage Orders, select Edit, review the imported details, choose your carrier and service, and complete any missing information.
- You get your shipping label. Create the shipment, then print or download its label in SmartConsign.
- Tracking is returned For integrations that support tracking updates, SmartConsign sends tracking information back to the connected sales channel.
Find your sales channel setup guide →
Review and ship imported orders →
Choose the route that matches where your shipment information comes from.
| What you’re looking for | Where to go |
|---|---|
| An order imported from your store | Marketplaces → Manage Orders |
| A shipment you manually saved to finish later | Shipments → Saved Shipments |
| A shipment created with a carrier | Shipments → Manage Shipments |
| A label or tracking information | Open the created shipment’s Shipment Details |
Email SmartConsign Support with the page you’re using, the shipment or order reference if available, and the exact error message or a screenshot. Never include your password.
For more account and shipping tools, see Using SmartConsign.